
Your house, your chests, the farm you built with friends… You can take the world from your Minecraft Bedrock Realm with you and carry on playing on a BoxToPlay Bedrock server.
The process is simple: download the world, keep a backup, upload its folder to the server, then check your game. We’ll use Minecraft Bedrock on a Windows PC and the official Minecraft Bedrock server, also called BDS.
Before you start
You’ll need Minecraft Bedrock on Windows, the account that owns the Realm, and a BoxToPlay Minecraft server. We’ll install Minecraft Bedrock (Official) in step 3. If a friend owns the Realm, ask them to download the world for you. This guide covers Bedrock Realms and does not convert Java Realms worlds.
Use a stable version compatible with your world. You don’t need Minecraft Preview. If the Realm uses a newer version than the one available for your server, wait until that version is available before moving the world. A Java server, even one that lets Bedrock players join, cannot load this world directly.
Two quick checks can save you trouble later:
- Do your friends play on Xbox, PlayStation, or Switch? These consoles don’t offer native personal server entry by IP address as Windows and mobile do. Check how they will connect and try it before leaving Realms.
- Does the world depend on Marketplace add-ons? These add-ons aren’t supported on our BDS. Keep your Realm and contact our support team before moving a world that uses them.
1. Download the right world from Realms
Pick a time when nobody is playing. Ask your friends to leave the Realm and stay off it during the transfer. Anything built after the download won’t be in your copy.
In Minecraft Bedrock:
- Open Play, then the Realms tab.
- Open the Realms Hub for your Realm, then choose World and select the slot containing your world.
- Find the world you want, open the three dots next to Edit world, and select Download World.
Depending on your game’s layout, you may also find the button under Edit World → File Management → Download World. Wait for the download to finish. Your copy will then appear in your list of local worlds.
Don’t delete the Realm. Keep it as a fallback until everything works on the new server.
2. Export the copy to your computer
In your local worlds list, open the settings for the world you just downloaded. Look for Export World, under General → File Management in layouts that use those sections.
Save the file to your Desktop with an easy name, such as MyRealm.mcworld. Duplicate the file and put a copy in a separate folder. Keep that backup untouched.
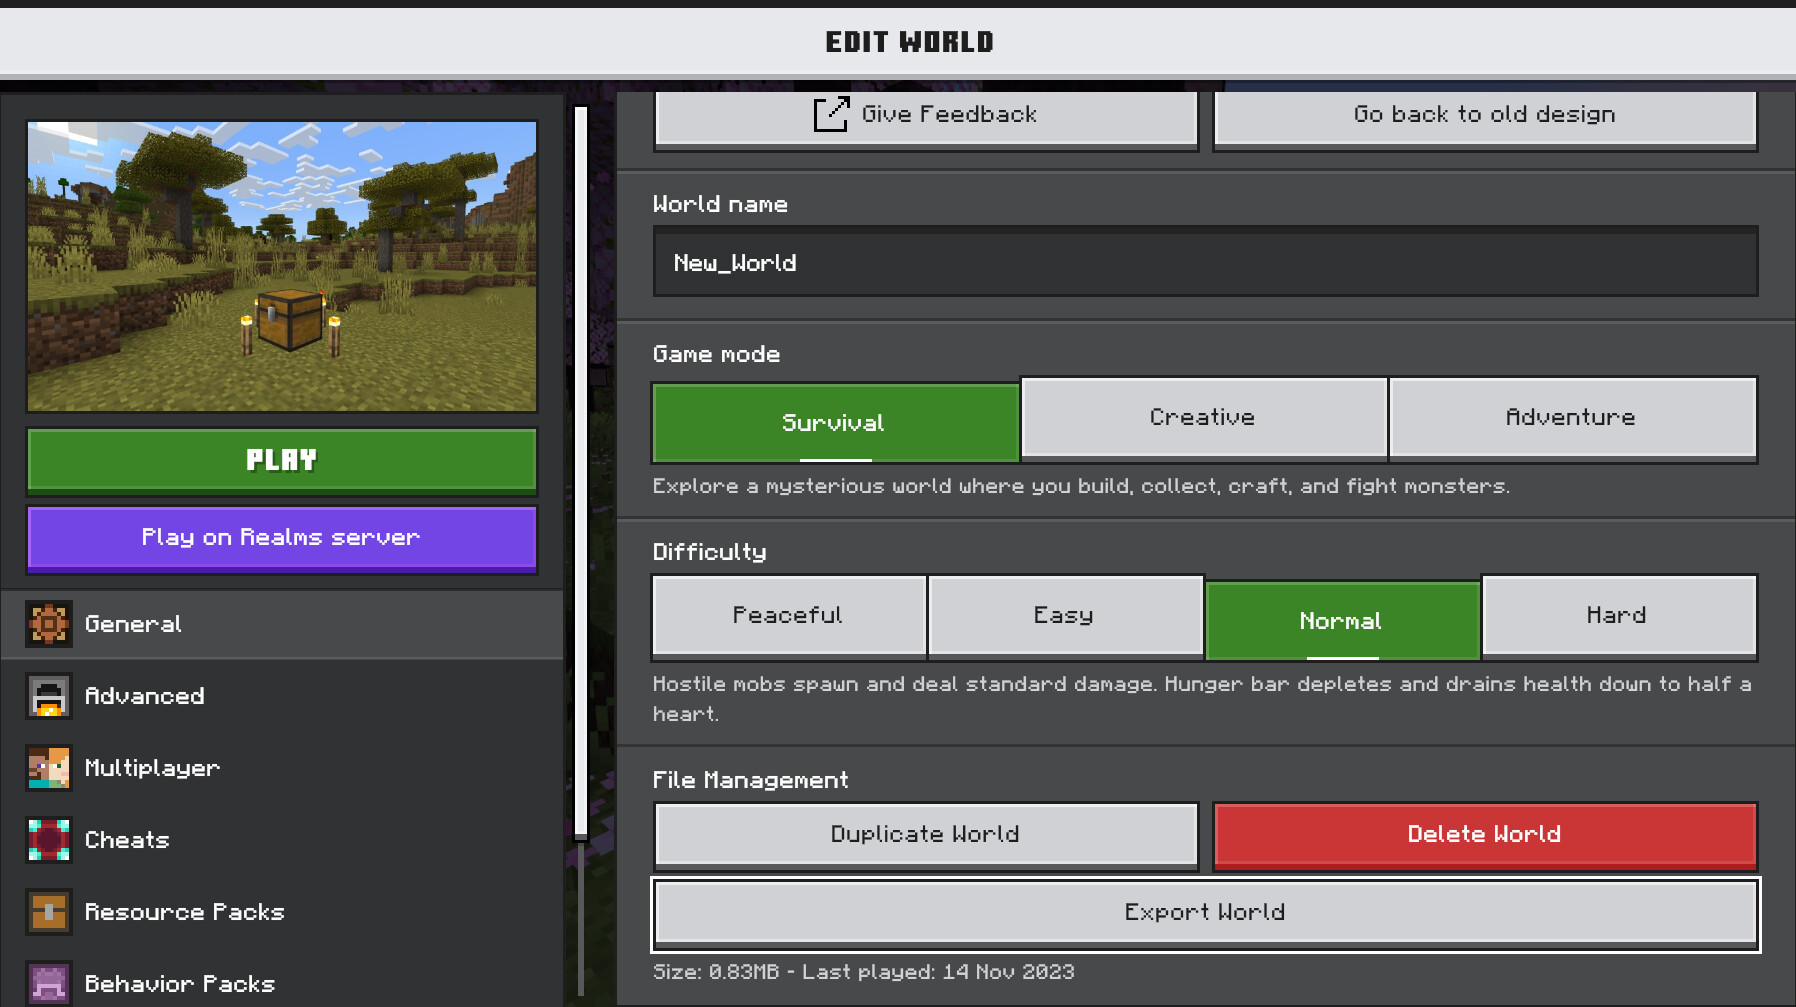
The “Export World” button is shown at the bottom of this example. Image: Microsoft Learn. The layout may vary with your game version.
3. Prepare your BoxToPlay server
If your BoxToPlay server already holds a world you care about, back it up before any installation or changes.
If the official Bedrock server isn’t installed yet, open Minecraft Installation, then the Server for Console / Mobile category. Install Minecraft Bedrock (Official). If it’s already installed, there’s no need to reinstall it. Our introduction to Bedrock and NukkitX explains the difference between these options.
Start the server once so it creates its folders, then stop it and wait until it is offline.
Next, open the FTP page in your BoxToPlay account. It provides the address and port for transferring files and lets you manage your FTP accounts.
In FileZilla Client, fill in Host, Username, Password, and Port using those details, then click Quickconnect. Your files are on the left, and the server’s files are on the right. Use the panel’s FTP port, which is separate from the game port.
4. Upload the world folder
A .mcworld file is an archive: several files packed into one.
We’ll use the name MyRealm. Before uploading, check that the server doesn’t already contain a worlds/MyRealm folder. If it does, choose another short name without accented letters, such as MyRealm2, and use it instead of MyRealm throughout the following steps.
- If Windows hides file extensions, show them first. On Windows 11: View → Show → File name extensions. On Windows 10: the View tab → File name extensions.
- Rename your working copy from
MyRealm.mcworldtoMyRealm.zip. If Windows asks you to confirm the file extension change, click Yes. - Right-click the ZIP and choose Extract All.
- Find the folder that directly contains
level.datand thedbfolder. Rename that folderMyRealm. - In FileZilla, open
worldson the right. On the left, right-click theMyRealmfolder and choose Upload. Wait until the transfer queue is empty and no failed transfers remain.
The result should look like this:
worlds/
└── MyRealm/
    ├── level.dat
    ├── levelname.txt
    ├── db/
    └── the rest of the world's files and folders
The correct location is worlds/MyRealm/level.dat. If you have worlds/MyRealm/MyRealm/level.dat, there’s an extra folder in the way. Keep all pack files and folders included in the export too.
Don’t upload just the ZIP: the server needs the extracted folder with all its files.
5. Tell the server which world to load
With the server still stopped, open Configuration in your BoxToPlay panel. Enter MyRealm in World name, then click Save.
Match the folder name exactly, including uppercase and lowercase letters. Enter only MyRealm, without worlds/ or .mcworld. This field refers to the folder uploaded by FTP, which may have a different name from the one shown in Realms.
Also check the game mode and difficulty so they match your Realm’s rules. Leave the ports assigned by BoxToPlay unchanged.
To keep the game private, add your gamertag and your friends’ gamertags under Players → Manual Entry → Allowlist → Add. A gamertag is their Microsoft account’s player name, not their email address. Then enable Whitelist in Configuration and save before starting the server. Realm invitations aren’t carried over automatically.
If you prefer to edit server.properties
Open server.properties in the server’s main folder and replace the line starting with level-name= with:
level-name=MyRealm
Save the file back to the server. This setting corresponds to the panel’s World name field. You can use either method.
You don’t need to copy the seed. A seed is used to generate a world. Here, you’re bringing the world and its builds with you.
6. Check your game before inviting your friends
Start the server and wait until the panel shows Online. In Minecraft Bedrock on Windows, open Play → Servers → Add Server, then enter the address and port shown in your BoxToPlay panel. Use the same Microsoft account you used on the Realm.
Once you’re in, take a few minutes to check:
- Your house, builds, and chests.
- Your inventory, equipment, and Ender Chest.
- Important places in the Nether and the End, if you used them.
- The creatures, items, and textures from any add-ons.
Ask a friend to join and check their progress and connection too. Reassign operator rights in the panel only to people you trust. These administration rights are separate from permission to join the server.
If an inventory is empty or content is missing, keep the Realm and the original export. Stop the new server before changing its files, then contact our support team and explain what you’re seeing. Don’t randomly remove packs to force the world to start.
If something doesn’t work
| What you see | What to check first |
|---|---|
| A fresh world appears | The level-name value and the location of level.dat. |
| “Outdated Client” or “Outdated Server” | Compatibility between the game and server versions. |
| Items or textures are missing | Whether the exported packs are present and compatible with BDS. |
| A friend can’t join | The address, port, allowed players, and their console connection method. |
Once everything is working, take a server backup and share the new address with your group. Continue playing on this server only: the Realm and the dedicated server do not sync automatically.
Your world is ready for its next chapter. Explore our Minecraft server hosting plans to host it with BoxToPlay and keep building with your friends.