Upload a world, add plugins or download a backup: an FTP client transfers files between your computer and your Minecraft server. Here’s how to connect with FileZilla Client, available free for Windows, macOS and Linux.
1. Find your FTP credentials
In your BoxToPlay customer account, open your Minecraft server, then File access (FTP).
The Connection Information card shows the server address and port 21. Your username and password are listed under FTP accounts.
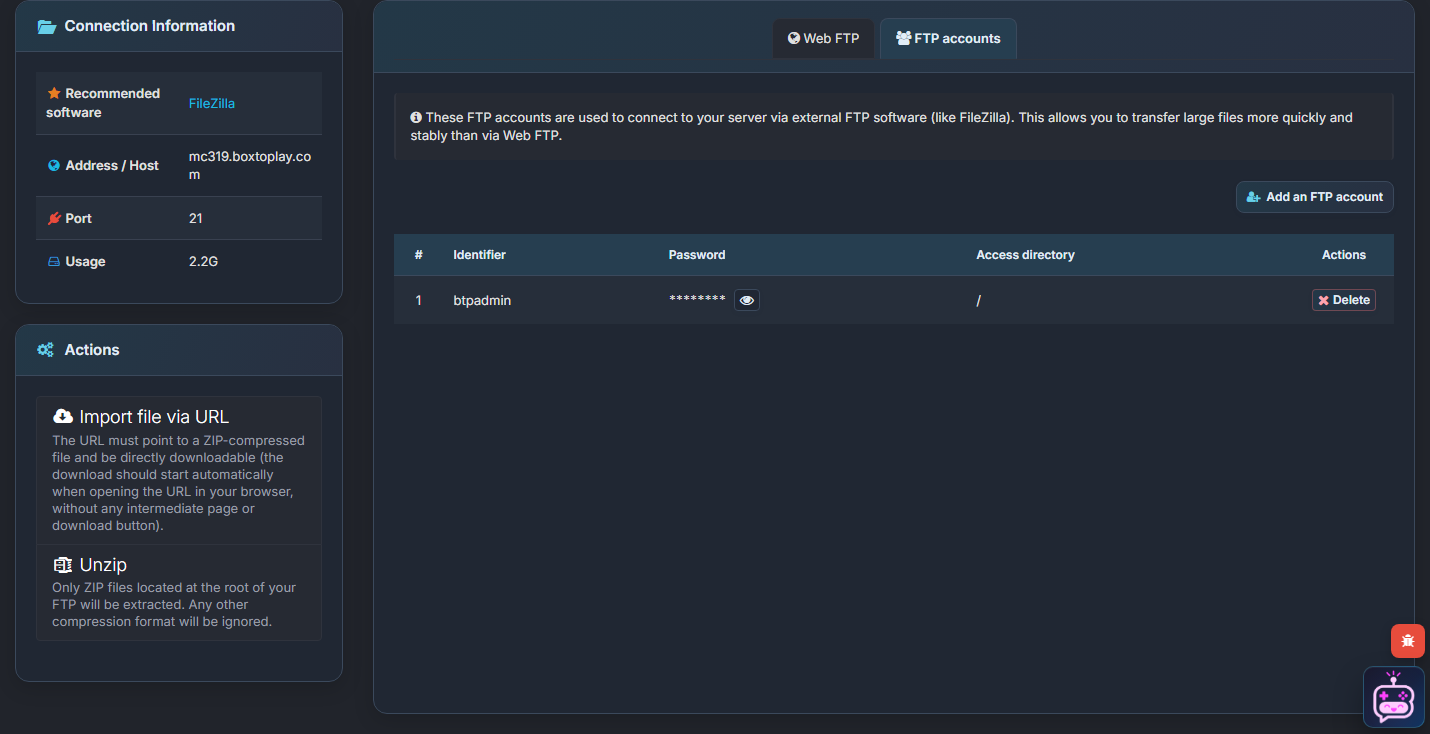
If you do not have an FTP account yet, click Add an FTP account and enter a username and password. Under Access directory, leave / selected to access all server files, or choose a folder to restrict access to it, then click Validate.
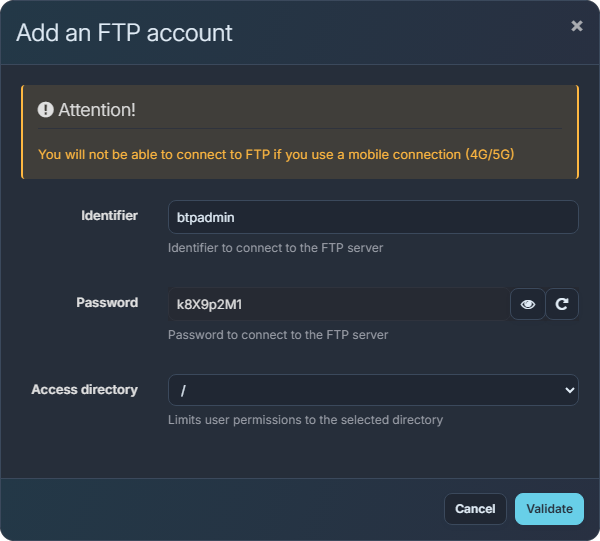
The eye icon in the accounts table reveals the password to use in FileZilla.
2. Save your server in FileZilla
Open File → Site Manager, click New Site and give it your server’s name. In the General tab, enter the following details:
| Setting | Value |
|---|---|
| Protocol | FTP |
| Host | The address shown in the panel, for example mc319.boxtoplay.com |
| Port | 21 |
| Encryption | Require explicit FTP over TLS |
| Logon Type | Normal |
| User | Your FTP account username |
| Password | Your FTP account password |
Under Transfer Settings, select Passive, then click Connect. TLS encryption protects transfers to and from your server.
Your settings are now saved in Site Manager for future connections. If you already use WinSCP or Cyberduck, use the same credentials with explicit FTP over TLS on port 21.
3. Transfer your files
In FileZilla, Local site, on the left, shows files on your computer. Remote site, on the right, shows your server files within the directory your FTP account can access.
Drag a file from left to right to upload it, or from right to left to download it. Open the destination folder first: plugins/ for a plugin, for example.
On Minecraft Java, the main files and folders are:
| File or folder | Contents |
|---|---|
world/ |
The world and player data. Its name may vary with your configuration. |
plugins/ |
Plugins and their settings on Paper, Spigot and compatible servers. |
mods/ and config/ |
Mods and their settings on Forge, NeoForge or Fabric. |
server.properties |
The main server settings. |
logs/latest.log |
The log to check when an error occurs. |
ops.json and whitelist.json |
Server operators and allowed players. |
When backing up a world, copy its other dimensions too. Depending on the server software and version, these are inside the world folder or in separate folders such as world_nether/ and world_the_end/.
After an upload, check Failed transfers. If a file appears there, read the error in the log, fix the problem and return it to the queue.
4. Import or replace a world
Stop the server before replacing a world or downloading a complete copy. Minecraft updates its files while the game is running.
- Wait for the panel to show Offline.
- Back up the existing world, including its dimensions and player data.
- Upload the new world to an empty folder to avoid mixing its files with the old world’s files.
- Once the transfer finishes, select the imported world on the panel’s world management page if its name has changed.
- Start the server.
The imported world must be compatible with your Minecraft version and installed mods. Check its location too: you should have world/level.dat, for example, rather than world/world/level.dat.
Upload a world as a ZIP
To group the world files together, compress the world folder into a .zip on your computer. Keep the world folder inside the archive: a world named world should appear as world/level.dat, alongside its other files.
With the server stopped:
- Upload the ZIP to the server root, using an FTP account with access to
/. - On the panel’s FTP page, click Unzip, then confirm.
- Wait for extraction to finish and check the files before selecting the world and starting the server.
Unzip extracts every ZIP at the root. Only leave archives there that you intend to extract.
Web FTP for a quick edit
To read a log or edit a configuration file, open the panel’s Web FTP tab. You can open a text file, edit it and save it directly in your browser.
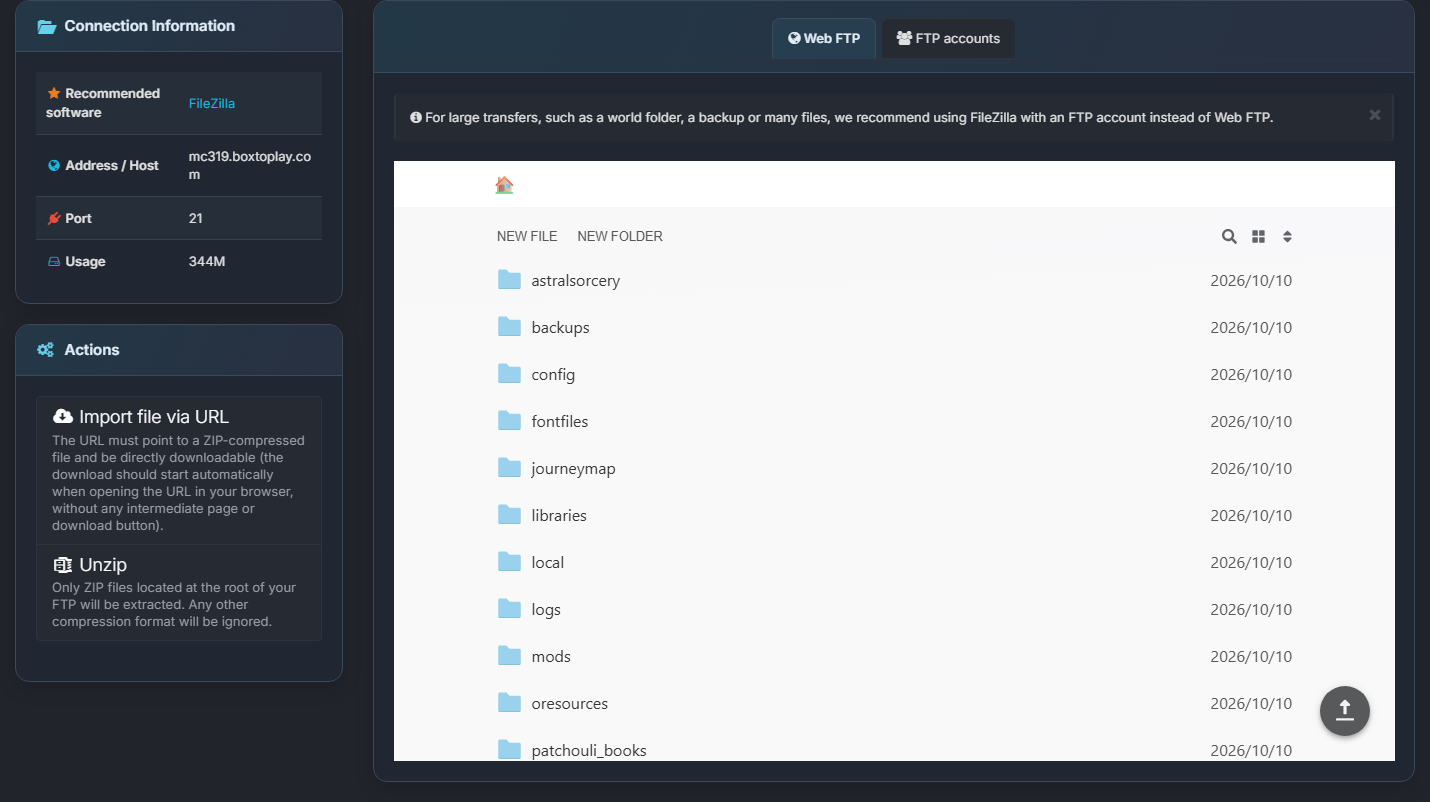
FileZilla is handy for uploading entire folders and tracking several transfers at once. To host your next world with friends, explore our Minecraft server plans.